This project was my first after recovering the use of my right hand. I was contracted to design and build two tanks. One to house a seven year old alligator snapping turtle and one to house several young snakes. The following is the documentation of the turtle tank.
My directives were:
– Corner tank that gave as much space as possible for the turtle while not obstructing the flow of the laboratory.
– Stand underneath with cabinets for storage, which terminates at height of adjacent window sill.
– Lowered front pane for ease of tank service and aesthetic.
The Alligator Snapping Turtle is a threatened species native to the southeastern United States. It is one of the heaviest turtles, typically maturing to a weight of over forty five pounds. They are carnivorous, hunting with the use of their tongue which acts as a lure to attract fish in to their powerful snapping jaws. Their bite is one of the strongest in the world, capable of busting apart wooden branches like pretzels.
At seven years old this particular Alligator snapper was formerly housed in a sixty gallon standard fish tank. Far too small for his rapidly expanding size. The tank I designed holds over one hundred and sixty gallons, weighs around five thousand pounds when full of water, allows eleven square feet of roaming real estate for our spiked friend, uses a two inch drain to evacuate the contained water in under two minutes and even has little nifty shelves up top for various tank accessories and necessities.
The cabinet stand as I designed can support over twenty three thousand pounds distributed evenly before risking a structural failure. Its skeleton is built from just under sixty feet of doubled 2×4’s. The cabinet’s top structure has more than eight (depending how you count them) mitered joints to maximize the evenness of weight distribution to the lower support columns. Two simple beveled cabinet doors allow access to two inside shelves and the drain valve.
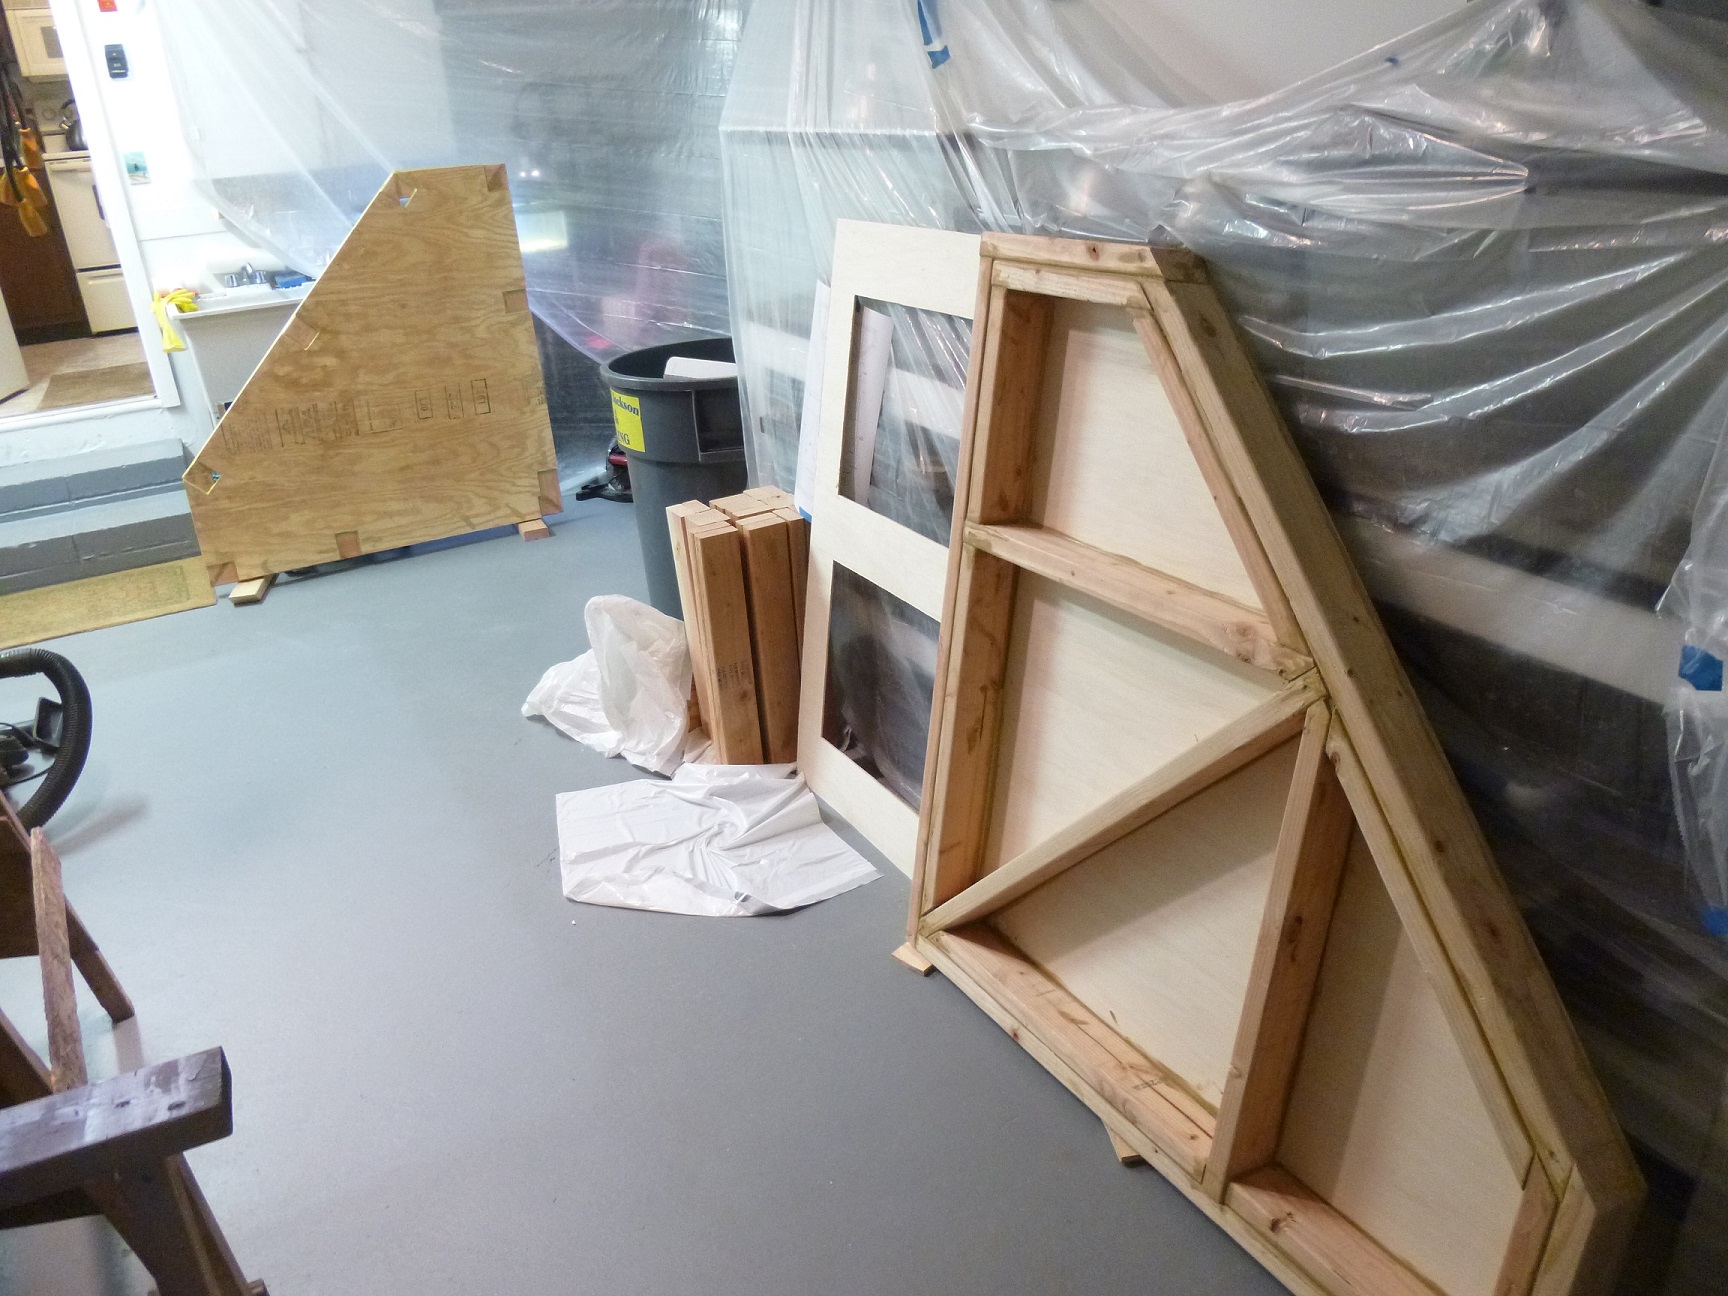
I set up a temporary shop in the garage to build the cabinet. Construction, paint and finishing took five days. I derived some 2d rough drafts from my 3d models to use as reference while cutting and constructing.
Fascia pieces and top plate as seen above were cut from 1/4 inch birch ply. Shelves were 1/2 inch common ply. Cabinet doors were 3/4 inch common ply. All points of contact were sealed with Loctite Premium Wood. All structural members were attached with either 3-1/2″ or 2-1/2″ exterior Deckmate screws. Fascia was fastened with finish nails and, of course, sealed with Loctite.
Every wooden piece was primed with two coats of Kilz oil-based wood penetrating primer. I chose this because A) It’s excellent B) The tank exists in a super high humidity laboratory where all structures built previous to my arrival have experienced severe bowing and C) To protect against any possible bulk water event. The cabinet top was top coated with Rust-Oleum oil-based flat black. Fascia were top coated in Behr Premium Plus acrylic brown (scooped up for $2 from the discount rack). All support columns were backed up with L hurricane ties, probably for no good reason.
I removed the old mouldings from the wall to create a flush install. The cabinet is anchored to the floor and I rewired the outlet being covered to become a part of the cabinet. I also installed a three bulb halogen fixture above the tank and installed a pull chain switch in to that fixture. My biggest regret on this project was contracting out the construction of my acrylic design. The intent was to save time and ensure the highest quality end product.
The company I used, which came highly recommended, was Creative Art owned by John Makkay in Plumbstead Township New Jersey. They charged $2800 ($1200 less than two other bidders) and assured a one week turnaround. They called me to tell me the job was done, a week past our agreed deadline, and I arrived to find bubbled seams which could not hold water. They had to reinforce the joints with stock strips of acrylic and re-seal the seams. Worst of all, when I finally got the two hundred and fifty plus pound tank to the laboratory I noticed the drain hole was cut in to the wrong side of the floor of the tank! Instead of having a neat elbow that would shoot the drain straight out through the wall which had all ready been cut, I had to grab new fittings and plumb the drain all the way across the cabinet. Most heartbreaking, I had to cut a second hole in the top plate of my cabinet.
I installed a two inch Sioux Chief shower drain in the floor of the tank. It comes with a rubber gasket which was likely sufficient in and of itself for water tightness, but I also used Loctite plastic specific epoxy to seal the PVC of the drain to the engraved part of the acrylic. From my research epoxy is the only sealant which will reliably adhere acrylic to PVC.
After finally putting the tank up on its stand I was able to install the bit of moulding I purchased to minimize the tank’s base seam. The tank was cut from two sheets of 3/4″ high end Acrylic. I designed everything seen here in Solidworks. Those files are available both on my website and the Grabcad website.